TL;DR
Three roof types dominate the RV market — EPDM rubber, TPO, and fiberglass — and they each have different vulnerabilities, sealant requirements, and inspection cadences. The most common cause of an RV being totaled before its time is water intrusion from a neglected roof. Treat the roof like the most expensive surface on your rig, because it is.
Here's a number that ought to be on a poster somewhere: the most common reason a 10-year-old RV gets scrapped isn't a transmission failure, a frame issue, or a fire. It's water damage. Specifically, water damage that started as a tiny crack in a sealant bead on top of the roof, ignored for a season, then ignored again, then noticed too late. By the time water reaches the ceiling visibly, it has already destroyed the OSB or luan decking, the insulation, often the sidewall studs near the leak, and frequently the floor below where it eventually pools. The math is brutal. A $12 tube of sealant prevents an $18,000 structural repair. We've watched it happen to more friends than we can count.
The Coachmen Pursuit we owned had two roof leaks we discovered six months in. The Alliance had seven. We're not making either of those numbers up; they're in the defect log we maintained for the warranty claims. We've talked to dozens of other RV families since starting CrappyRV and the pattern is consistent — roof attention is the single highest-leverage maintenance task in RV ownership, and it's the one most owners completely ignore for the first two years. That's the gap this post is meant to close.

Know your roof
Step one is identifying what you have. The three common RV roof materials in 2026 behave differently and need different care. If you don't know what's on top of your rig, find out before you do anything else. The build sheet says. The dealer can confirm. If neither of those works, climb up there with a magnet (you can rule out aluminum) and look at the surface.
EPDM rubber
The most common RV roof material for the last 30 years. EPDM is a synthetic rubber membrane, usually black underneath with a white or off-white top coat. You'll often see chalky white residue running down the sidewalls after rain — that's normal weathering of the top coat, not failure. EPDM is forgiving, repairable, and inexpensive to maintain. It's also susceptible to UV damage over time, particularly at seams and around penetrations. Expected service life: 10–15 years with good care; 5–7 with poor care.
TPO (thermoplastic polyolefin)
The newer kid on the block, increasingly common on units built after 2010 or so. TPO is a single-ply membrane that comes in various colors and has a harder, less rubbery feel than EPDM. It's more reflective (good for cooling), more resistant to UV (good for longevity), but it's less forgiving when it does fail — TPO tends to crack rather than weather gradually, and the repair products are different from EPDM. Don't mix sealants between the two; what works for EPDM may dissolve TPO and vice versa.
Fiberglass
Premium and high-end builds, plus most Class A coaches, use a one-piece fiberglass roof. Fiberglass is the most durable of the three by a wide margin — UV-resistant, structurally rigid, no membrane to tear. The trade-off is that when fiberglass fails (delamination, gel-coat cracking, stress fractures from flex), the repair is much more involved than swapping a piece of rubber. Inspection is similar to the membrane roofs; sealant work at every penetration is identical.
Aluminum
Less common in late-model RVs but you'll see it on older Airstream-style units and some vintage rigs. Aluminum roofs are essentially permanent if cared for; the issue is always the seams and the seal runs around penetrations, not the metal itself. We won't spend much space on aluminum here because the inspection and seal procedures are similar to fiberglass.
The honest version
The marketing for every RV manufacturer makes its roof sound bulletproof. None of them are. The factory installs a membrane, runs sealant beads at the penetrations, and ships the unit. Whether those beads hold for 10 years or fail in 18 months depends almost entirely on what you do — or don't do — once you take ownership.
What to inspect, and how often
Roof inspections fall into three rhythms. We covered this in less detail in our annual maintenance checklist; here's the deeper version.
Monthly: visual scan
From a ladder, or by walking the roof if your rig is rated for walk-on use (most are, but check your owner's manual — some lighter builds aren't). You're looking for the obvious stuff. Cracks in sealant beads. Lifted edges around vents. Pooled water (your roof should drain; if it doesn't, you've got a sag forming). Debris that's collected against a vent or seam. Anything that wasn't there last time.
This is a five-minute task. It is, dollar-for-time, the highest-ROI maintenance action you will ever perform on an RV.
Quarterly: hands-on check
This time you're up there with a flashlight and pushing on things. Soft sealant means it's degrading from underneath even if the surface looks intact. Pulling sealant off a seam means the bond has failed. Discoloration that wasn't there before — especially brown staining — is often a sign of water tracking from one penetration to another and surfacing somewhere unexpected.
Check every penetration: roof vents, plumbing vents, AC shrouds, refrigerator vent stacks, antennas, satellite mounts, solar mounts, skylights, slide tops, and the seams at the front and rear caps. The front and rear caps are where the membrane meets the molded fiberglass cap pieces, and that joint is the single most common roof leak location in RVs across all brands.
Semi-annual: full sealant assessment
Twice a year, do an inch-by-inch review. Bring tape and a marker. Anything questionable gets flagged. Anything that's clearly failing gets resealed before it rains again. This is also when you do the "before the rainy season" pre-emptive work — if you know you're heading into a wet stretch, beat the storms to it.
Our cadence is February (before spring rain) and August (before fall storms). Pick whatever fits your climate; the point is twice a year, not which two months.
Annual: deep clean
Once a year, wash the roof. EPDM roofs benefit from a dedicated EPDM-safe cleaner — Dicor sells one, several other reputable brands do as well. Avoid petroleum-based products, citrus cleaners, and anything with harsh solvents; they degrade the membrane. TPO is tougher but still likes a mild cleaner, not industrial-grade degreaser. Fiberglass takes about anything that's safe for boat gel coat.
Annual cleaning isn't vanity. UV degradation is accelerated by accumulated grime, particularly tree sap, bird droppings, and pollen. A clean roof lasts longer.
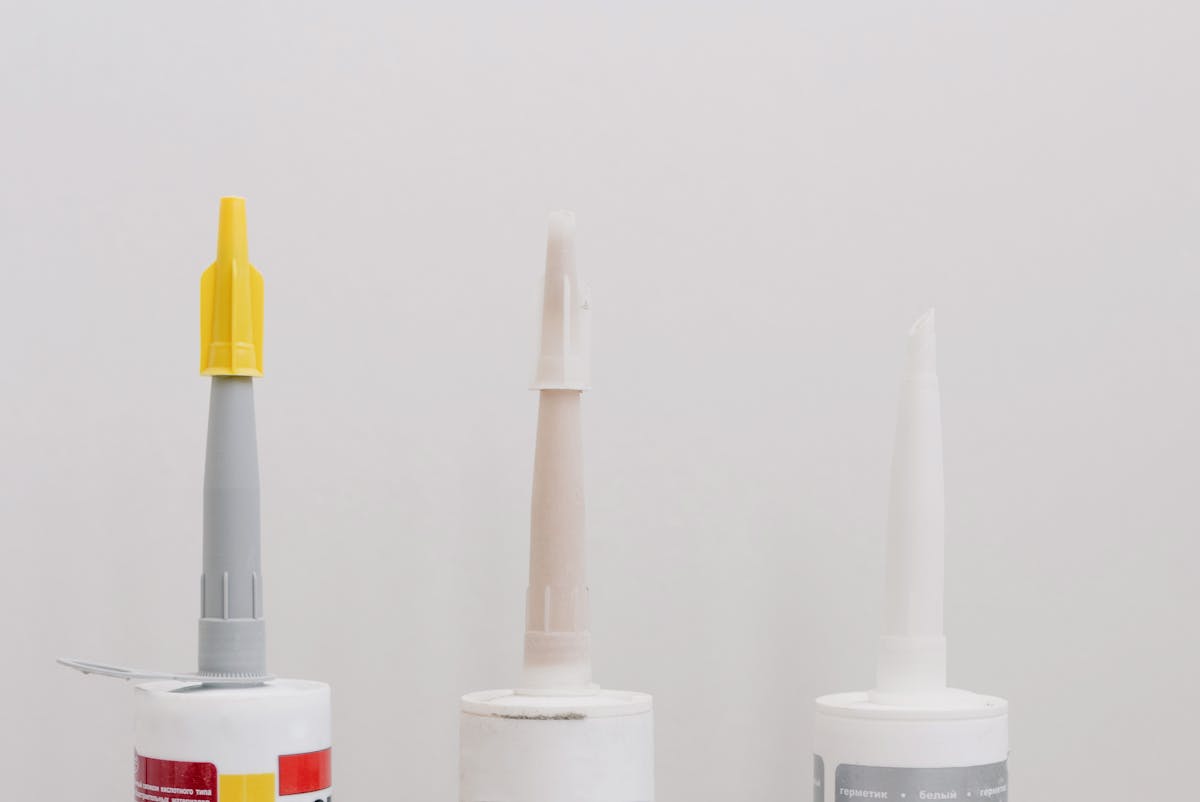
Sealant products: what to use where
This is the section where most well-meaning owners go wrong. There is no single magic roof sealant. There are several products that each have a specific job, and using the wrong one for a job either does nothing or makes the problem worse.
Self-leveling lap sealant (Dicor 501LSW and similar)
This is what you use on horizontal seams and penetrations on EPDM and TPO roofs. It's a thick liquid that flows out and self-levels into a flexible, weatherproof bead. Dicor is the household name, but ProFlex RV (Geocel) and several others make compatible products. Read the tube — the EPDM version and the TPO version are different. Don't cross them.
Self-leveling sealant goes on the roof. Not the sidewalls, not the cap-to-membrane joint when it's vertical, not anywhere it would run before curing. Just the horizontal stuff.
Non-sag lap sealant (Dicor 551 and similar)
This is the vertical version. Same chemistry family but formulated to stay put on a sloped or vertical surface. Use it on sidewall seams, the vertical portions of cap joints, and anywhere you need sealant to not run.
Butyl tape
Butyl is what goes under a roof component — beneath the flange of a vent, beneath an AC gasket, beneath the rear cap before it's screwed down. It's a sticky, putty-like tape that forms a primary seal. Lap sealant on top of that is the secondary seal, the one you can see and inspect. Both layers matter. Most factory installations skimp on butyl. When you're replacing a vent, this is your chance to do it right.
EternaBond
A high-strength acrylic-adhesive tape, sold in rolls of various widths. EternaBond is excellent for emergency repairs and for sealing over a seam permanently. It bonds aggressively, conforms well to curves, and lasts a long time. The catch: once you put EternaBond on, you don't get it off — the bond is essentially permanent. Use it where you're sure. Don't use it as a substitute for proper resealing of a vent that needs to come up periodically for service.
EternaBond works on EPDM, TPO, fiberglass, and aluminum. It's the closest thing to a universal repair tape in RV maintenance.
What not to use
Silicone caulk. Roofing tar. House construction sealants. Generic hardware store "RV sealant" with no specific roof rating. Any of these will fail on an RV roof — sometimes immediately, sometimes after a season — and once they fail, you have a sealant-removal job on top of the leak you were trying to fix. Spend the extra $4 per tube on the actual product.
How to do a basic re-seal
Most owners can handle the spot-resealing of a single penetration. Here's the procedure, lightly summarized. If a step makes you uncomfortable, stop and call a tech.
- Wait for dry weather. Sealant needs a few hours of dry curing time. Don't fight a forecast.
- Clean the area. Isopropyl alcohol on a rag. Wipe the failed sealant bead and the surrounding membrane to remove dirt and oils.
- Carefully remove failed sealant. Plastic putty knife. Not a metal blade — you'll cut the membrane. Take off only the loose or cracked material; you don't have to strip every old bead down to bare metal.
- Apply new sealant. Steady bead with the caulk gun, slightly overlapping the old material at both ends. Self-leveling on horizontal surfaces; non-sag on vertical.
- Smooth if needed. Self-leveling will mostly handle itself. Non-sag often benefits from a gloved finger tooling the bead.
- Don't get on it. Stay off the roof for the cure window the product specifies. Several hours minimum.
- Log it. Date and location in your maintenance log. You'll be glad you have this in five years.
When something's gone beyond a spot reseal — multiple failed seams in a row, suspected leak inside the wall, soft spots in the roof decking — that's a tech call. The NRVIA directory of certified RV inspectors and the RV Technical Institute tech directory are both good starting points. A roof tech with a moisture meter can map exactly where water has been before you spend money on cosmetics.
Telltales of an existing leak
If you're buying used, or you've inherited a rig you haven't owned long, look for these. Any of them means water has been somewhere it shouldn't.
- Ceiling staining. Brown or yellow halos around vent trim, light fixtures, or seams. Even a small stain matters — the water that caused it is doing something inside the wall right now.
- Soft spots in the ceiling or walls. Press gently. The ceiling should feel solid. Sponginess means rotted decking.
- Bubbling or delamination of interior wallpaper. The vinyl wallcovering separates from the underlying substrate when moisture has been working on the glue.
- Mildew smell. Not "old RV" smell. Specifically musty. That's not perfume; it's biology.
- Exterior delamination. Look at the sidewalls in raking light. Waves, bubbles, or rippling means the fiberglass has separated from the substrate underneath — usually because water got in.
- Stain trails down the inside of cabinets near the roof. Especially behind the back wall of overhead cabinets.
This is also the list every pre-purchase inspection should include. We routinely turn up roof issues in pre-purchase consultations that the dealer "didn't notice." Often the rig is still buyable; sometimes it's a hard walk-away.
The seasonal traps
A few seasonal patterns we've seen enough times to mention.
Winter freeze-thaw cycles destroy sealant. Water that's pooled on top of a roof seam, then freezes and expands, then thaws — that cycle, repeated through a winter, is the single fastest way to crack a sealant bead. If you store the rig outdoors in a cold climate, your spring sealant check should be aggressive.
Summer UV destroys EPDM faster than people think. If you store outdoors in a sunny climate, expect to be resealing more often than someone whose rig lives in covered storage. Reflective roof coatings (Dicor sells one; several others do) can extend EPDM service life materially.
Fall debris is a leak vector. Leaves, pine needles, and small branches collect against vents and AC shrouds, hold moisture, and provide a constant wet surface that accelerates sealant failure. Sweep the roof. Sometimes it's that simple.
Tree sap is the silent killer. Don't park under pine trees if you can help it. Sap eats EPDM coating, scars fiberglass, and is genuinely difficult to remove without degrading the surface underneath. We learned that one in a campground in Oregon.
Cost math
Let's put the numbers next to each other. These are 2026 ballpark prices from our own logs and shop quotes; your area may vary.
- One tube of Dicor self-leveling sealant: ~$10.
- A 4" × 4' roll of EternaBond: ~$30.
- Annual roof inspection by an NRVIA-certified inspector: $150–300.
- Reseal of all penetrations by an RV tech: $400–900.
- Roof membrane replacement (EPDM or TPO, mid-size trailer): $3,500–6,500.
- Water damage repair when caught early (one localized area): $1,500–3,500.
- Water damage repair when found late (delamination, structural): $8,000–25,000.
- RV totaled by insurance for water damage: the rest of your equity.
Look at that progression. Every dollar you don't spend on roof care multiplies into ten or a hundred when the damage shows up.
What the dealer probably didn't tell you
When we took delivery of our Alliance, the orientation included exactly zero roof-care guidance. We were told the unit had "a Dicor lap-sealed roof" and that was the end of the conversation. We didn't get a tube of Dicor with the rig. We didn't get a recommendation on cadence. We didn't get a tutorial on the front-cap seam, which turned out to be where most of our roof leaks lived. The dealership made several thousand dollars on our deal; an extra 15 minutes on roof care would have saved us thousands more in warranty headaches.
This isn't, in our view, an Alliance-specific issue. We talk to families who bought from every major brand and the gap is the same. The orientation walkthrough at delivery is built around showing off features, not transferring maintenance knowledge. That's a structural problem with how RVs are sold, and we've written about it in our PDI walkthrough post and why RV quality feels different. The fix is on the owner: assume nobody is going to tell you how to take care of the roof and learn it yourself.
The honest version
If you do exactly one piece of RV maintenance — only one, and you skip everything else — make it the monthly roof check and the quarterly sealant re-pass. That single discipline will protect more of your investment than any other habit, by a wide margin. Everything else is upside.
What this means for you
Identify what kind of roof you have. Buy the matching sealant products and keep them stocked. Set a monthly calendar reminder for a five-minute check. Plan a real, hands-and-knees inspection twice a year. Resealing a penetration is a DIY job; whole-roof work and any soft-decking discovery is a tech job. Log everything. Don't park under pine trees. If you buy used, factor a moisture-meter inspection into the deal price.
RV roofs aren't mysterious. They're just out of sight, which makes them easy to forget. The owners who don't forget are the owners whose rigs are still on the road in 15 years.
Good Luck Out There!